Easy Roofline Christmas Light Installation
11/18/24
Are you looking for a quick and easy way to install Christmas lights along your roofline? Rooftop Ridge Line Mounting Clips are here to make your holiday decorating a breeze! Forget the hassle of complicated and roof-damaging methods—these clips are simple to install, gentle on your roof, and deliver picture-perfect results. Plus, they’re strong enough to keep your lights secure, even in high winds and winter weather. Read on to see why these clips are a holiday game-changer and follow our easy guide to get your lights up fast.

Why Choose Rooftop Ridge Line Mounting Clips?
The Rooftop Ridge Line Mounting Clip is engineered for effortless installation while preserving the condition of your roof. Unlike other methods that may involve staples, nails, or lifting shingles, these clips simply latch over the shingle ridge, holding your lights securely without damage. Their benefits include:
- Easy Snap Design: The clip's snap mechanism ensures a secure fit.
- Versatile Compatibility: Works with C6, C7, C9, C9 Pixel Bulb, 12mm Pixel Bulb, G30, G40, Mini Lights, and Rope Light.
- No Roof Damage: Clips hold lights firmly without peeling or prying shingles.
- Adaptability: Compatible with 10", 12", and 13” standard 3-tab asphalt shingles, laminated shingles, most 10” or 12” ridge vents, and various metal roofs.
- Quick Removal: When the season ends, remove the clips easily and store them, with the lights attached if you wish, for future use.
Step-by-Step Guide to Using Rooftop Ridge Clips

Step 1: Measure Your Roofline
Before you begin, measure the length of your roofline to ensure you have enough lights to cover the entire span. This step will help you plan your installation efficiently and avoid any last-minute surprises. Once measured, gather your lights and the necessary number of Rooftop Ridge Line Mounting Ridge Clips. The number of clips will depend on the unique spacing of your lighting assembly.

Step 2: Insert the Lights
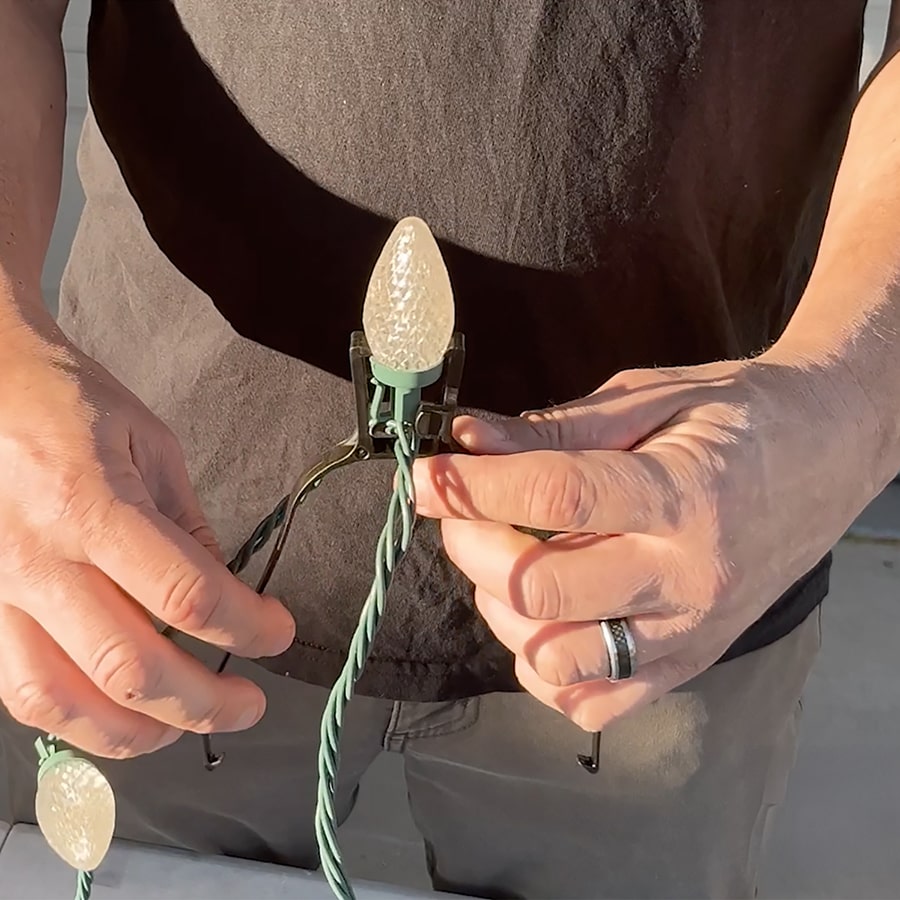
Pop the bulbs or rope light into the holders of each clip. The clip’s design will firmly grip the light, keeping it stable even during strong winds or heavy winter weather.

Step 3: Position the Clips on the Roofline
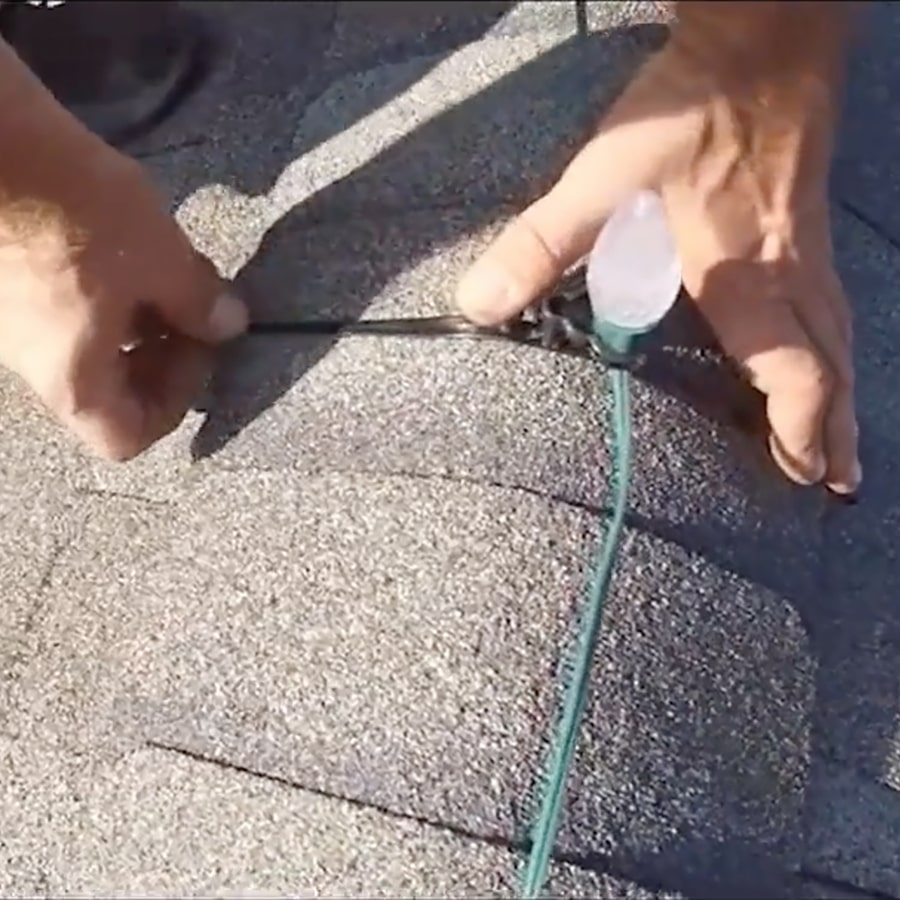
Take each clip with the light already inserted and slide it over the shingle at the ridge line of your roof. The clip will securely latch by grasping shingles on either side, ensuring a snug fit.

Step 4: Repeat Along the Ridge Line
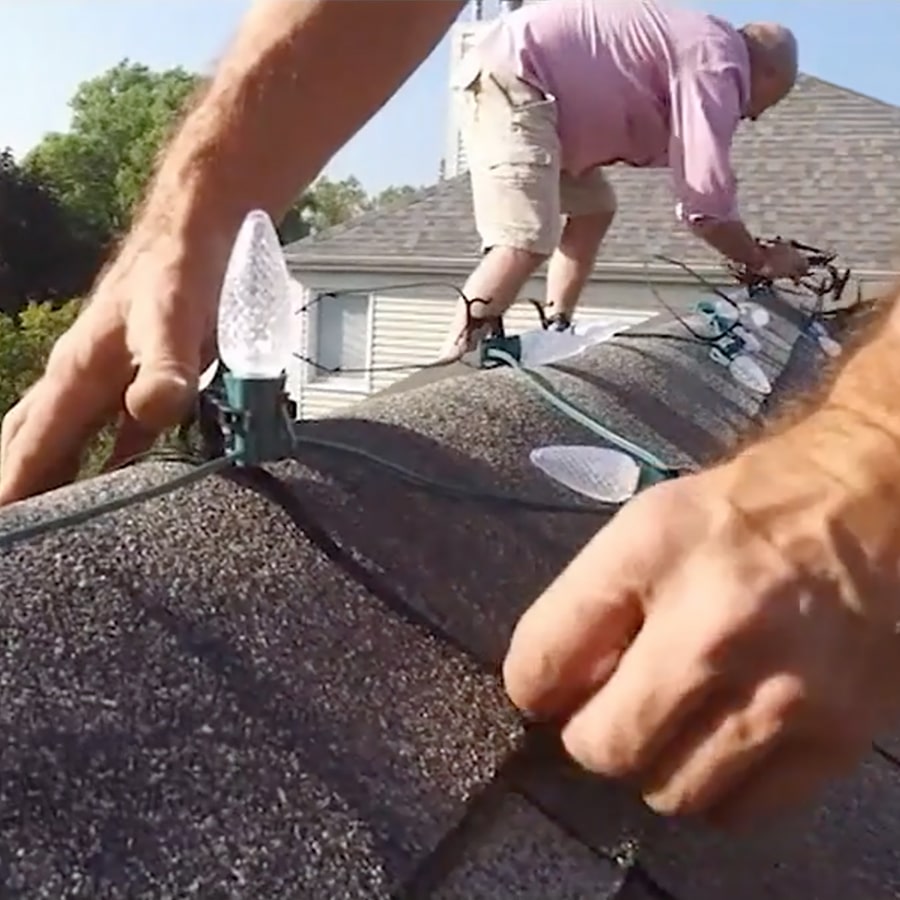
Continue placing clips at regular intervals along the ridge line. This ensures that your lights remain evenly spaced for a consistent, professional appearance.
When the holiday season is over, carefully remove the Rooftop Ridge Line Mounting Clips from the roofline. To make next year’s setup easier, leave the lights in the clips and store them together. This will save you time and effort during your next installation and keep your lights organized and ready to go.
Rooftop Ridge Line Mounting Clips make holiday decorating simple, secure, and efficient. For even more tools to make your Christmas light installation quick and hassle-free, visit Birddog Lighting's Christmas Accessories. Make this and future seasons stress-free with all the right accessories at your fingertips.


